Marvellous Monochrome: Charcoal
A Charcoal Warm Up
Have a go at this atmospheric approach to creating a charcoal sketch, where an eraser is your new best friend!
We’re playing with light amongst the dark, velvety tones of charcoal in this warm up.
You’ll need:
Paper - A4/5 is nice for a warm up sketch
Charcoal - willow is ideal, grab compressed too if you like to strengthen the darkest tones
Eraser - either putty or standard work great
Your reference image
This is one where hands will get dirty as you work with the charcoal, so an apron is a lovely way to protect your clothes and paper towel an easy way to wipe hands as you go

Step 1
Cover the paper completely with charcoal
Step 2
Use the eraser to ‘draw’ the lightest shapes within your reference image
A putty eraser will give you lots of soft edges to this
Step 3
Add the darkest shapes into the drawing using willow or compressed charcoal
There’s a few ways you can do this, including line drawing, making marks like loops or hatching, or using the charcoal on it’s side
Step 4
Continue working with eraser to bring out your image
You might find you’re working back into heavy charcoal areas with the eraser to add highlights or using your hands to blend the charcoal
For a quick warm up, focus on creating those 3 key tones in your sketch:
lightest areas & highlights with eraser
mid tone using the original charcoal layer
darkest shapes with willow or compressed charcoal
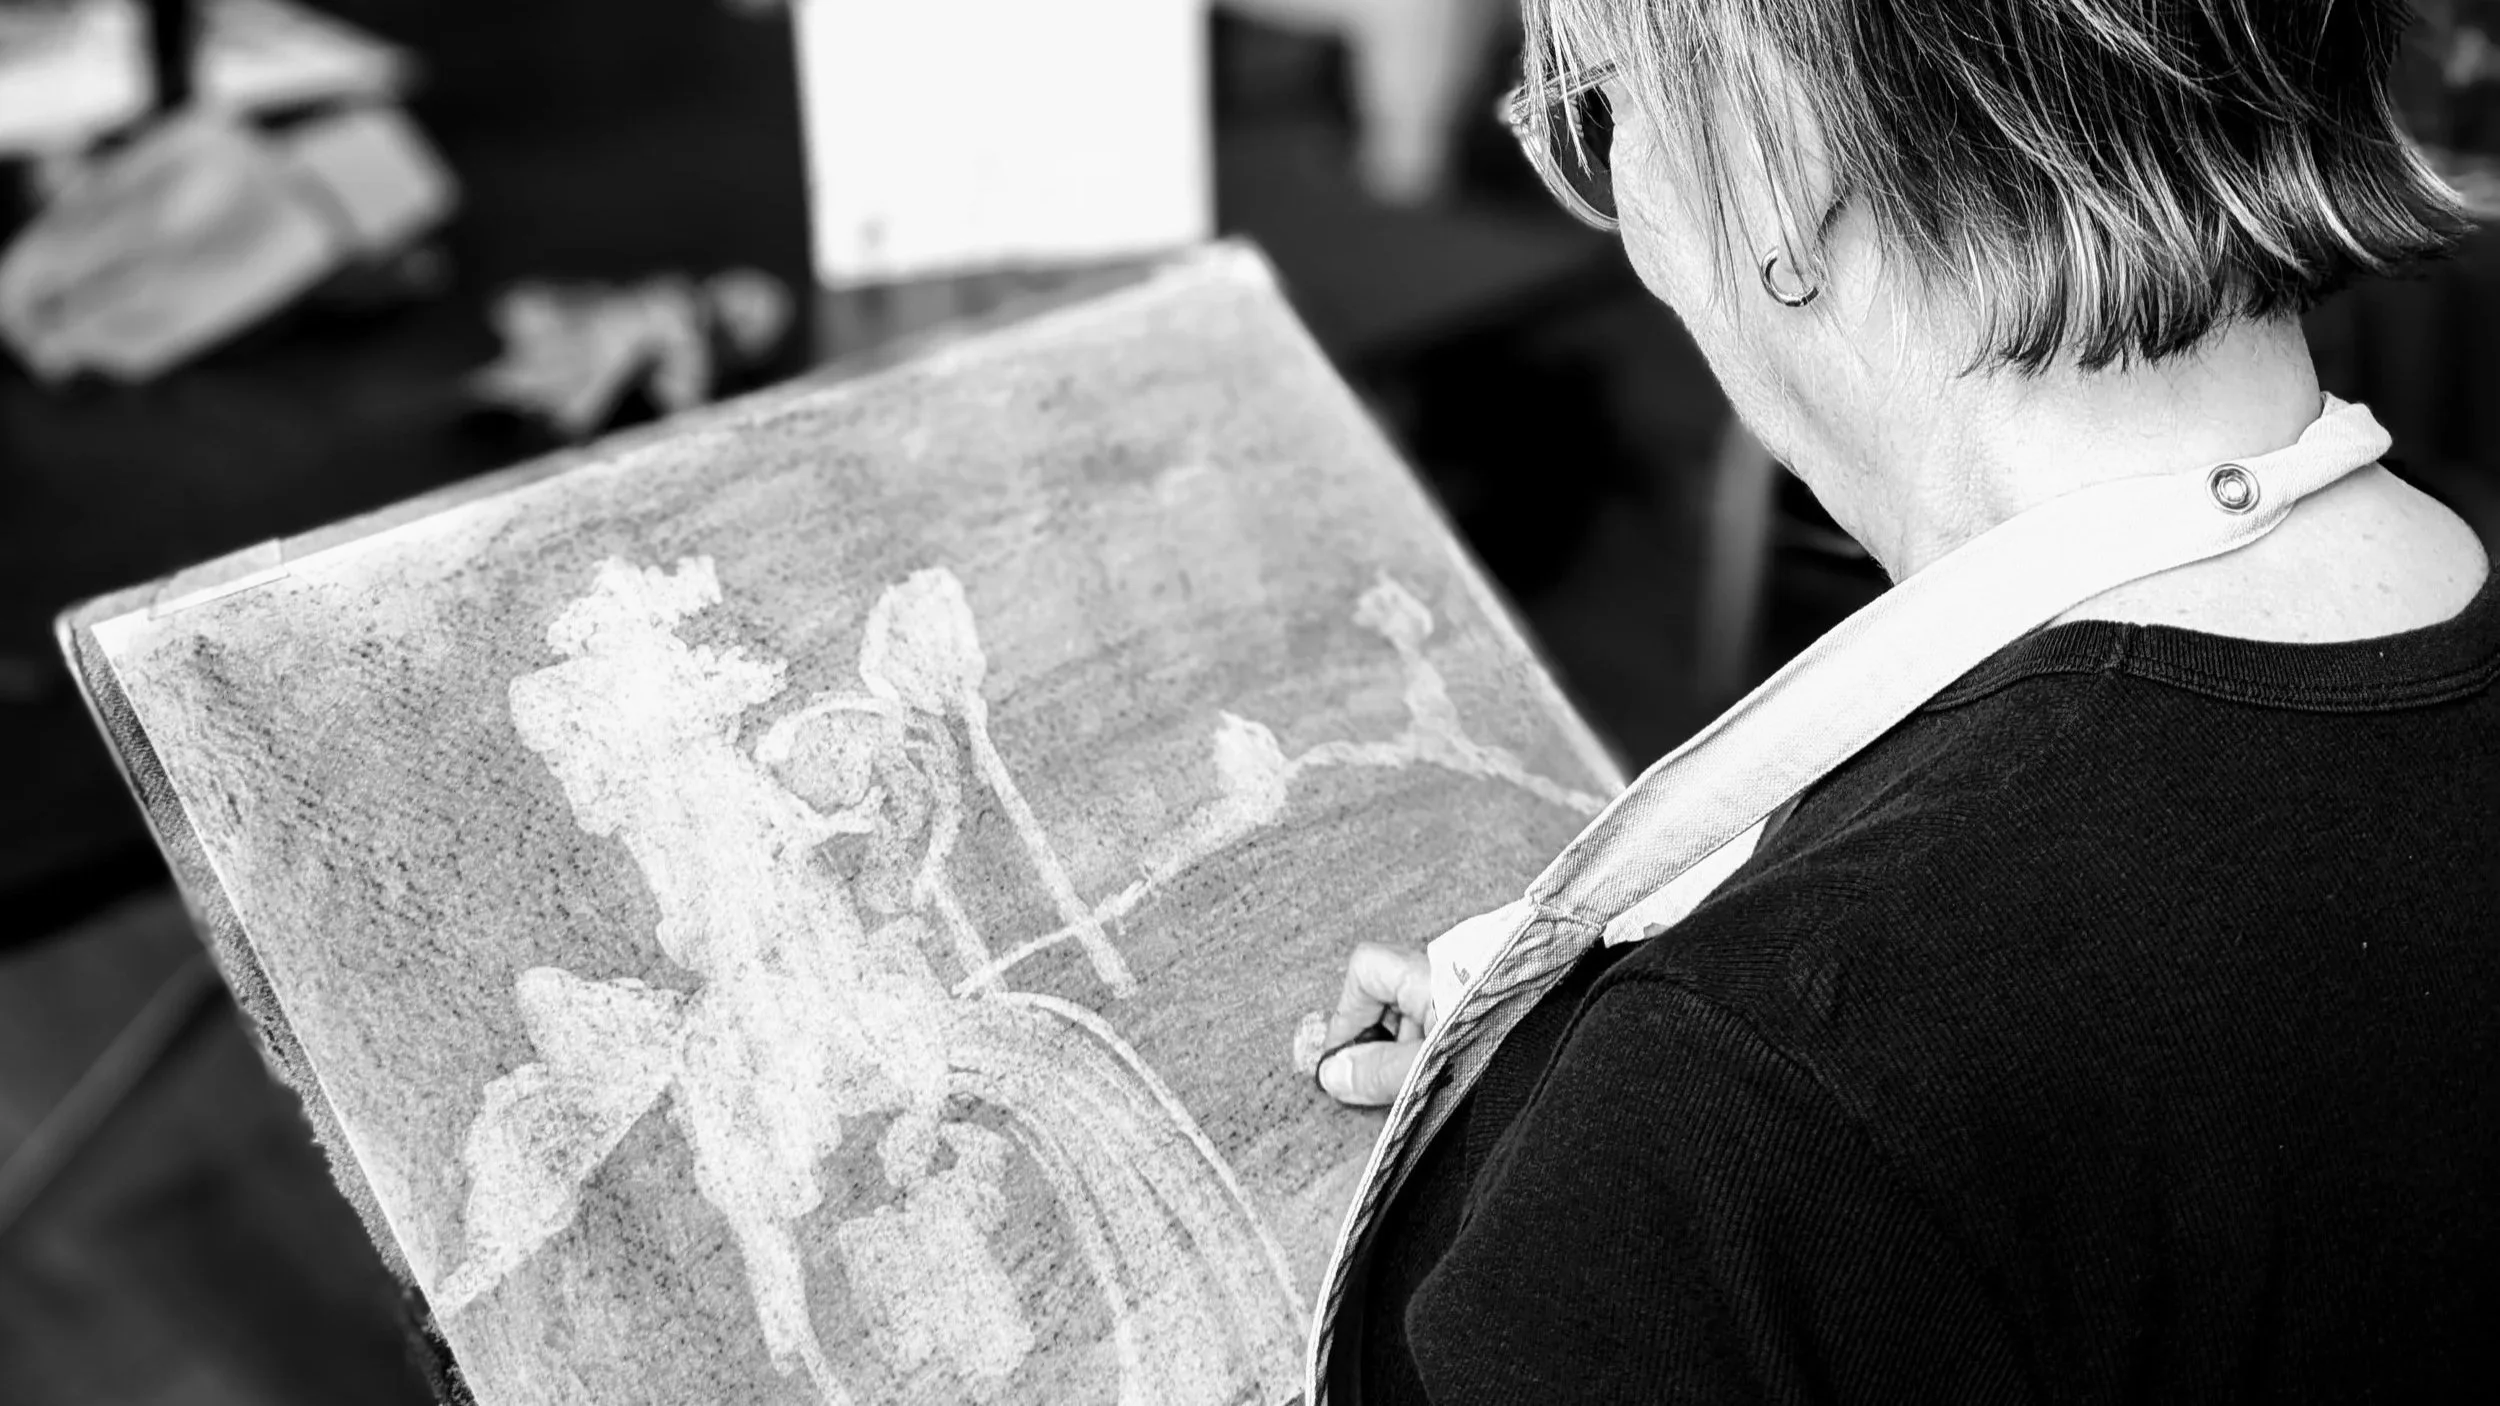
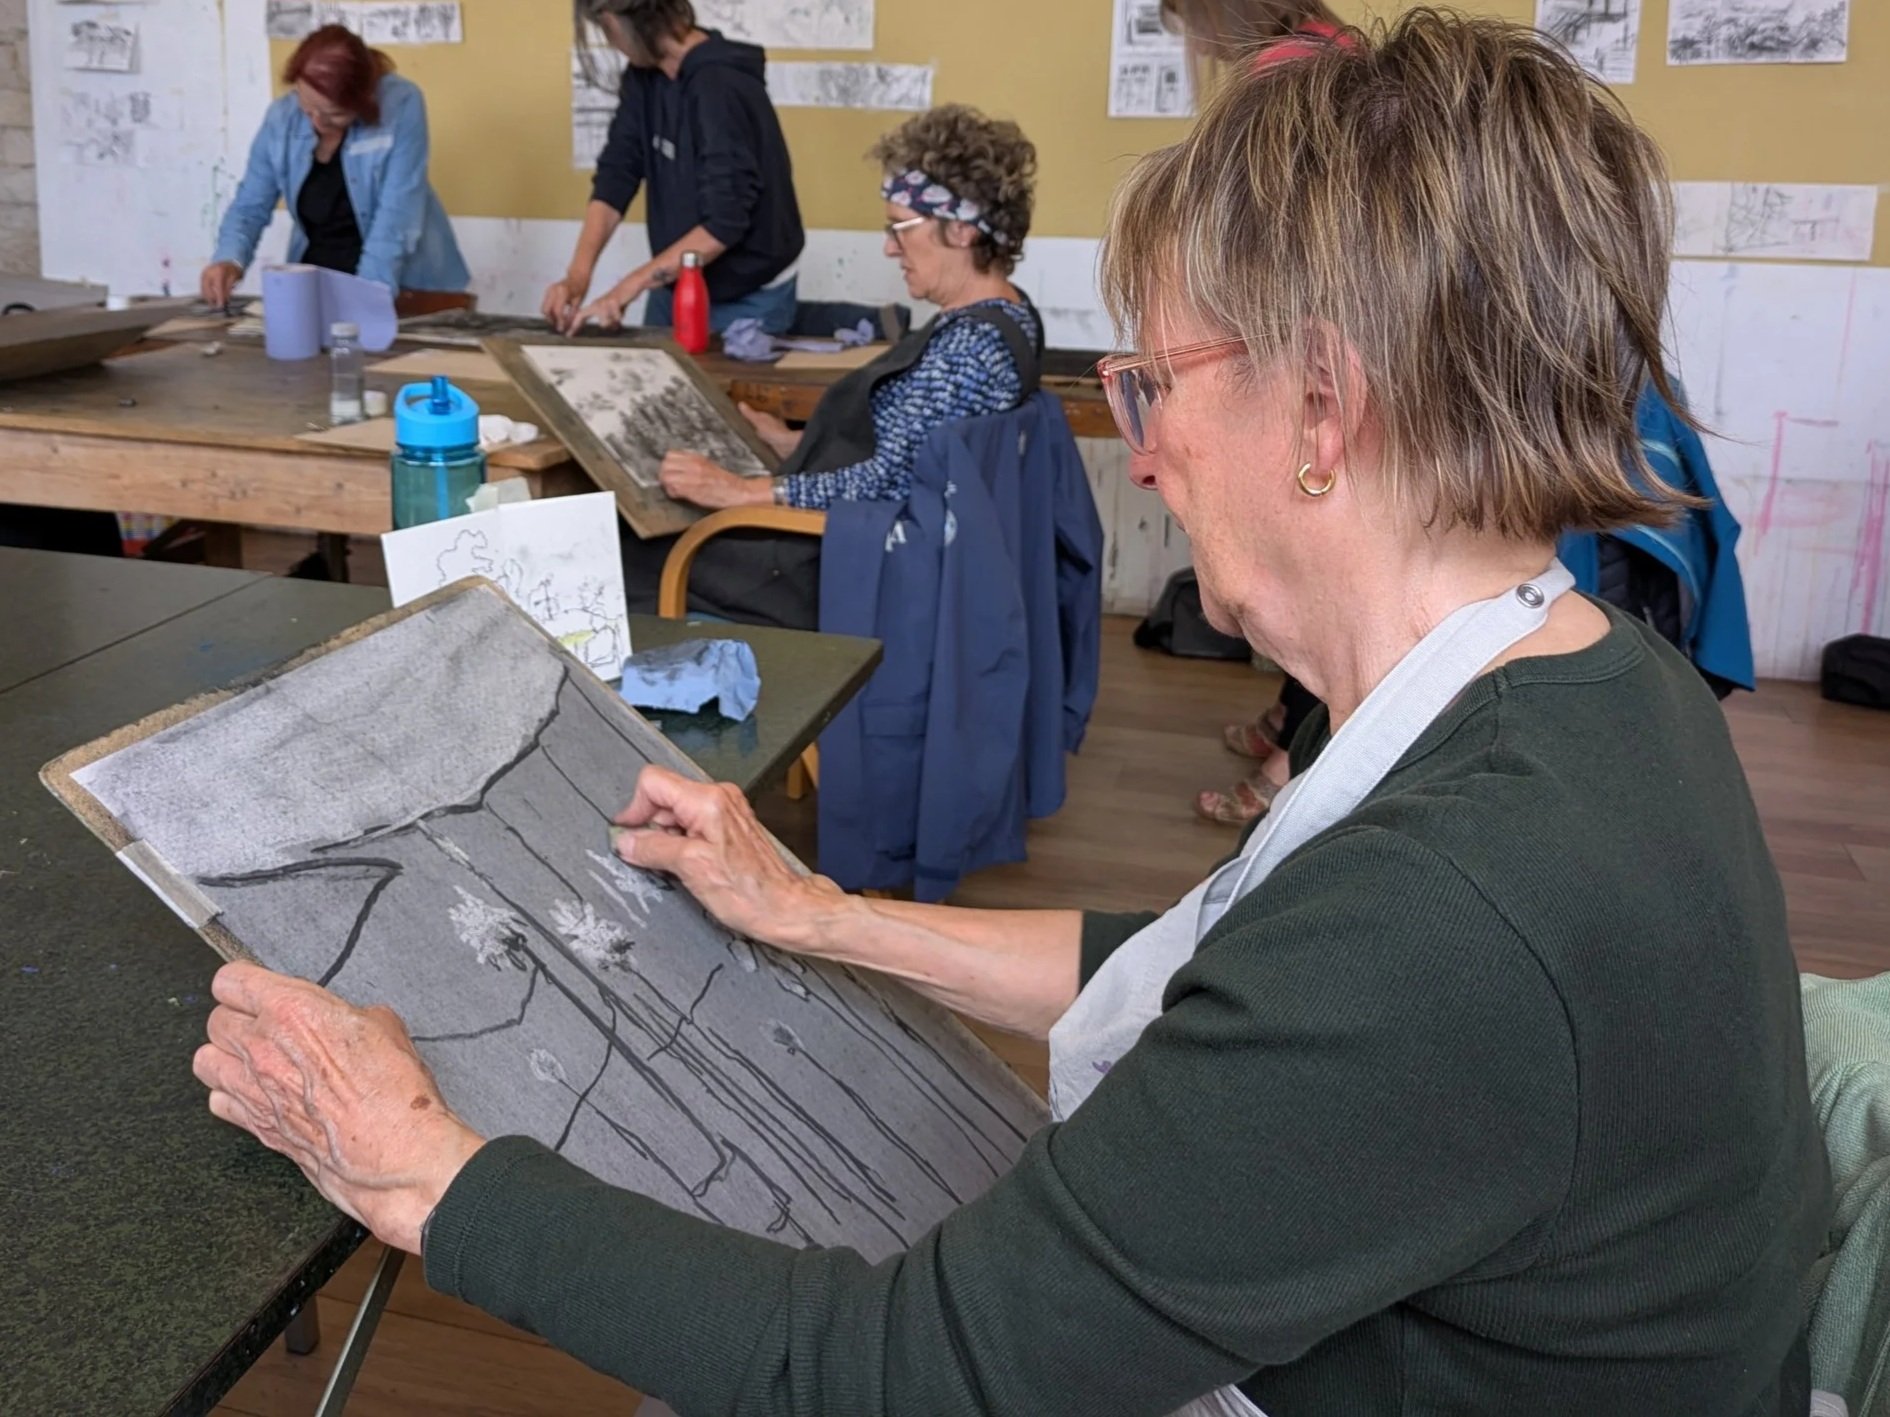
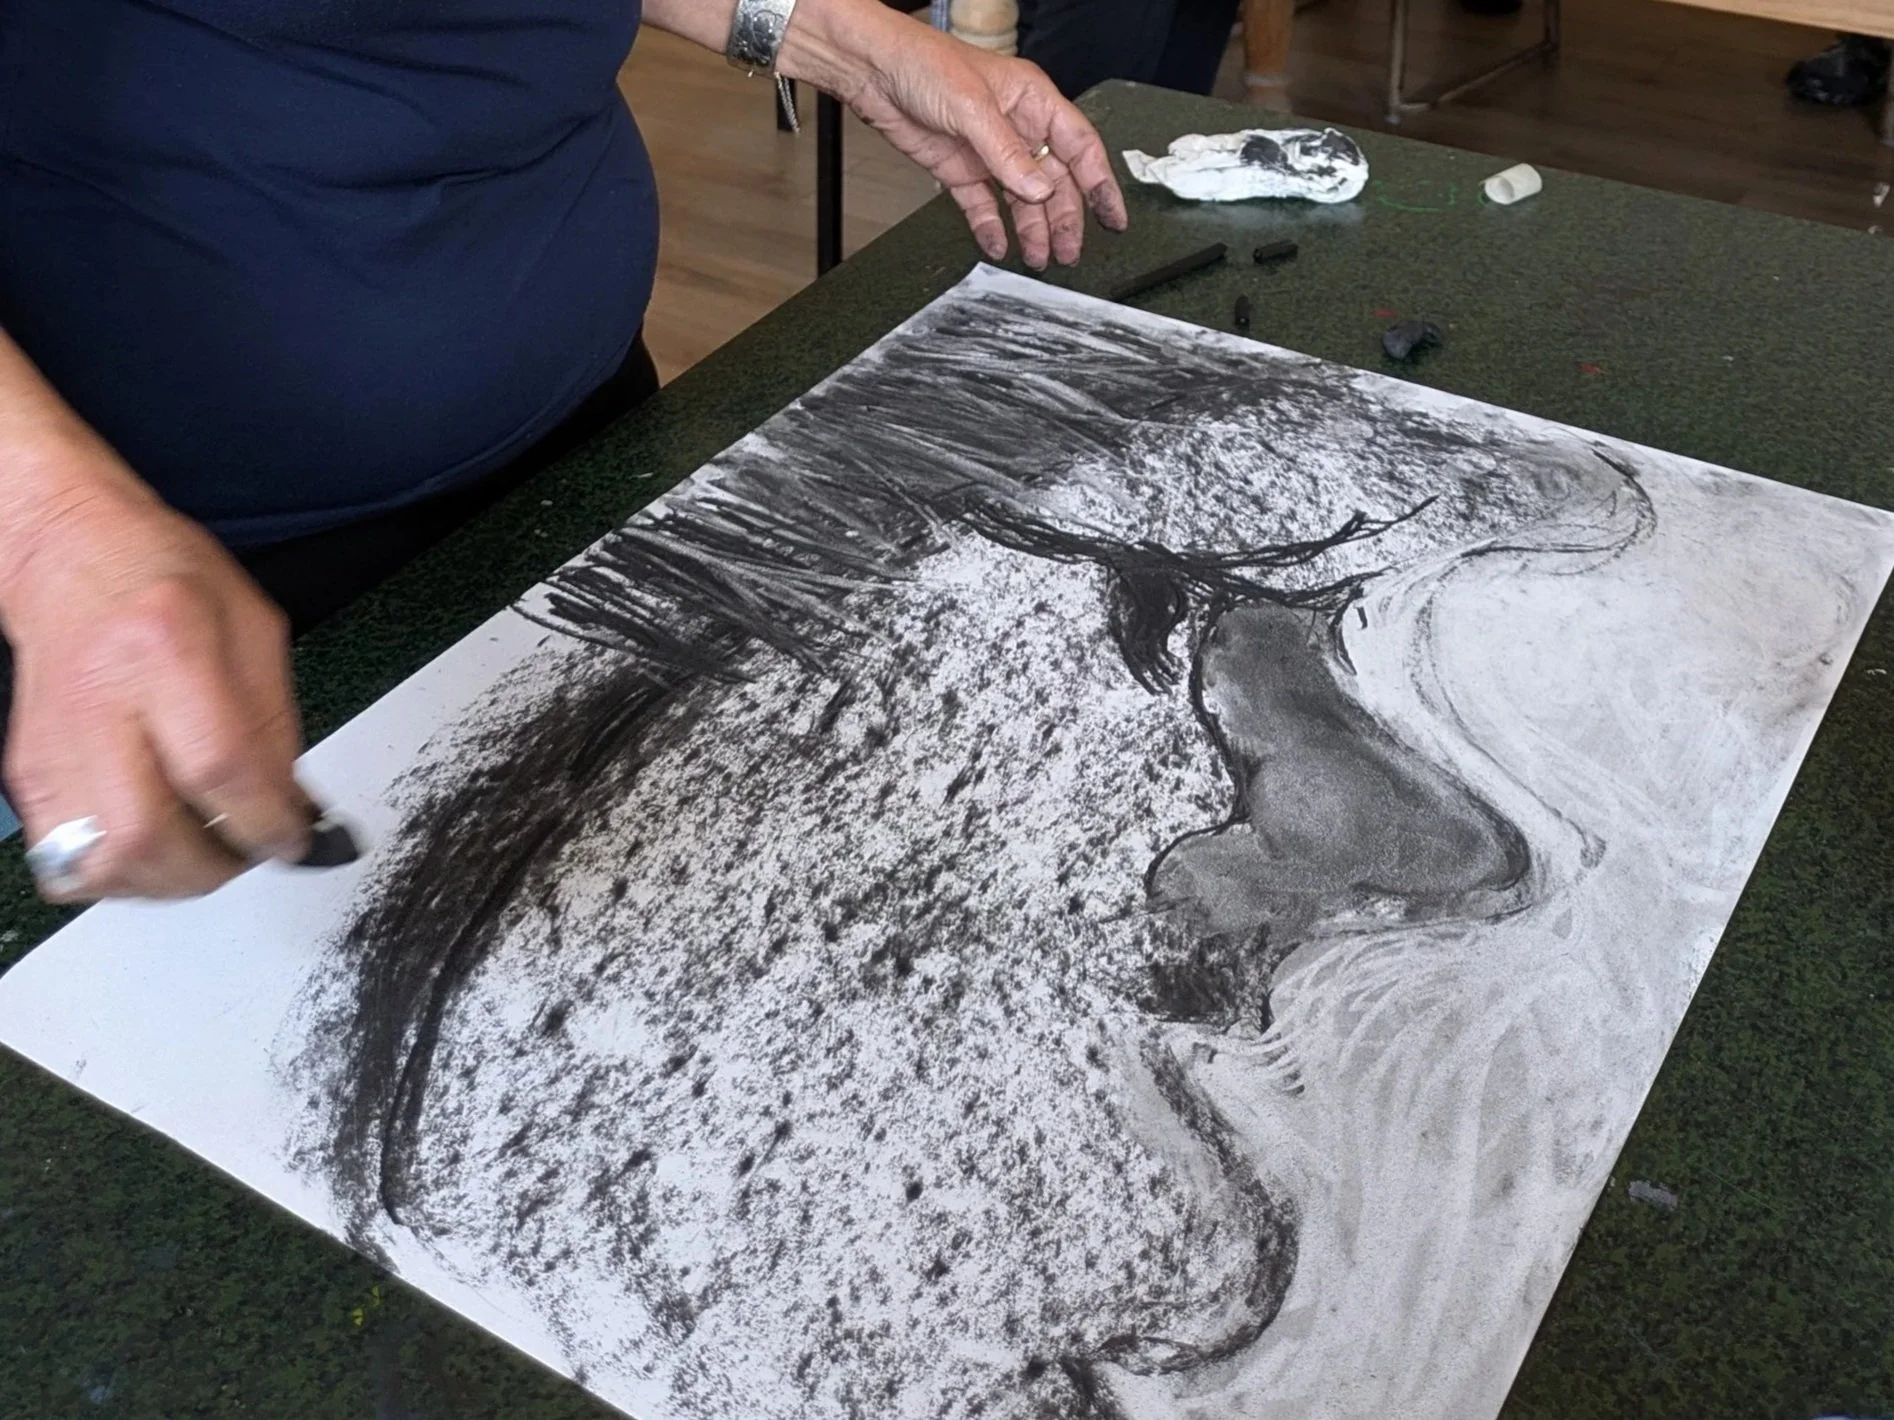
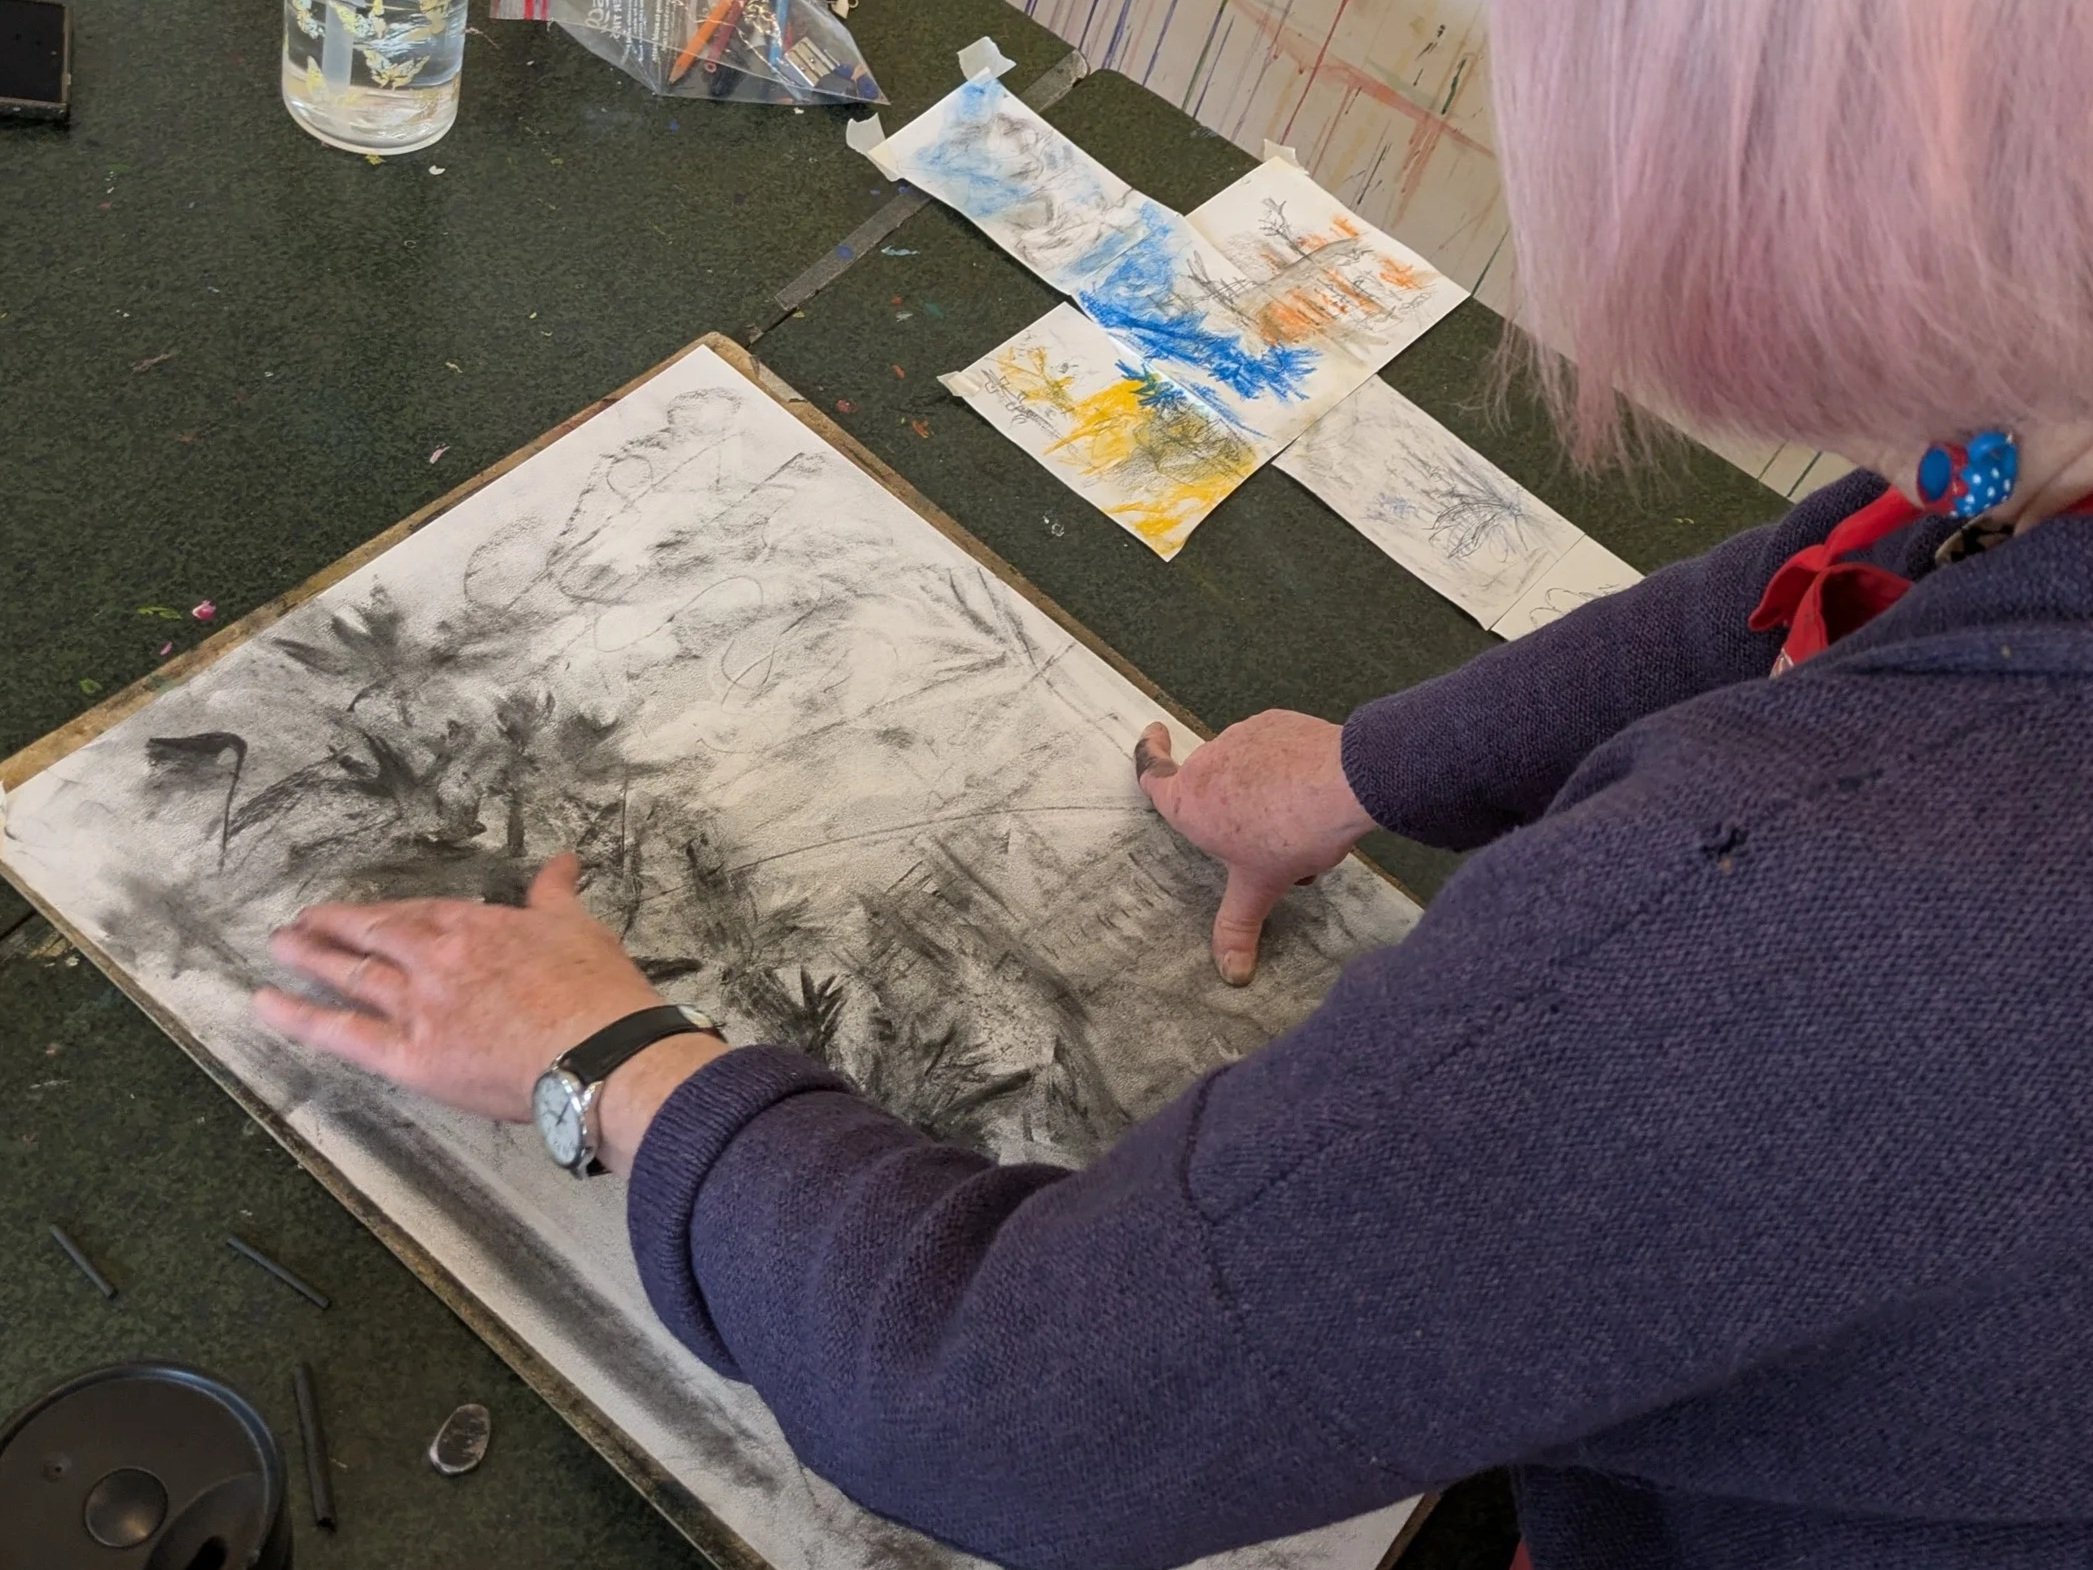
Here are a few images to inspire you created by students at DRAW Studio Summer School 2025 with myself and Jenny Purrett
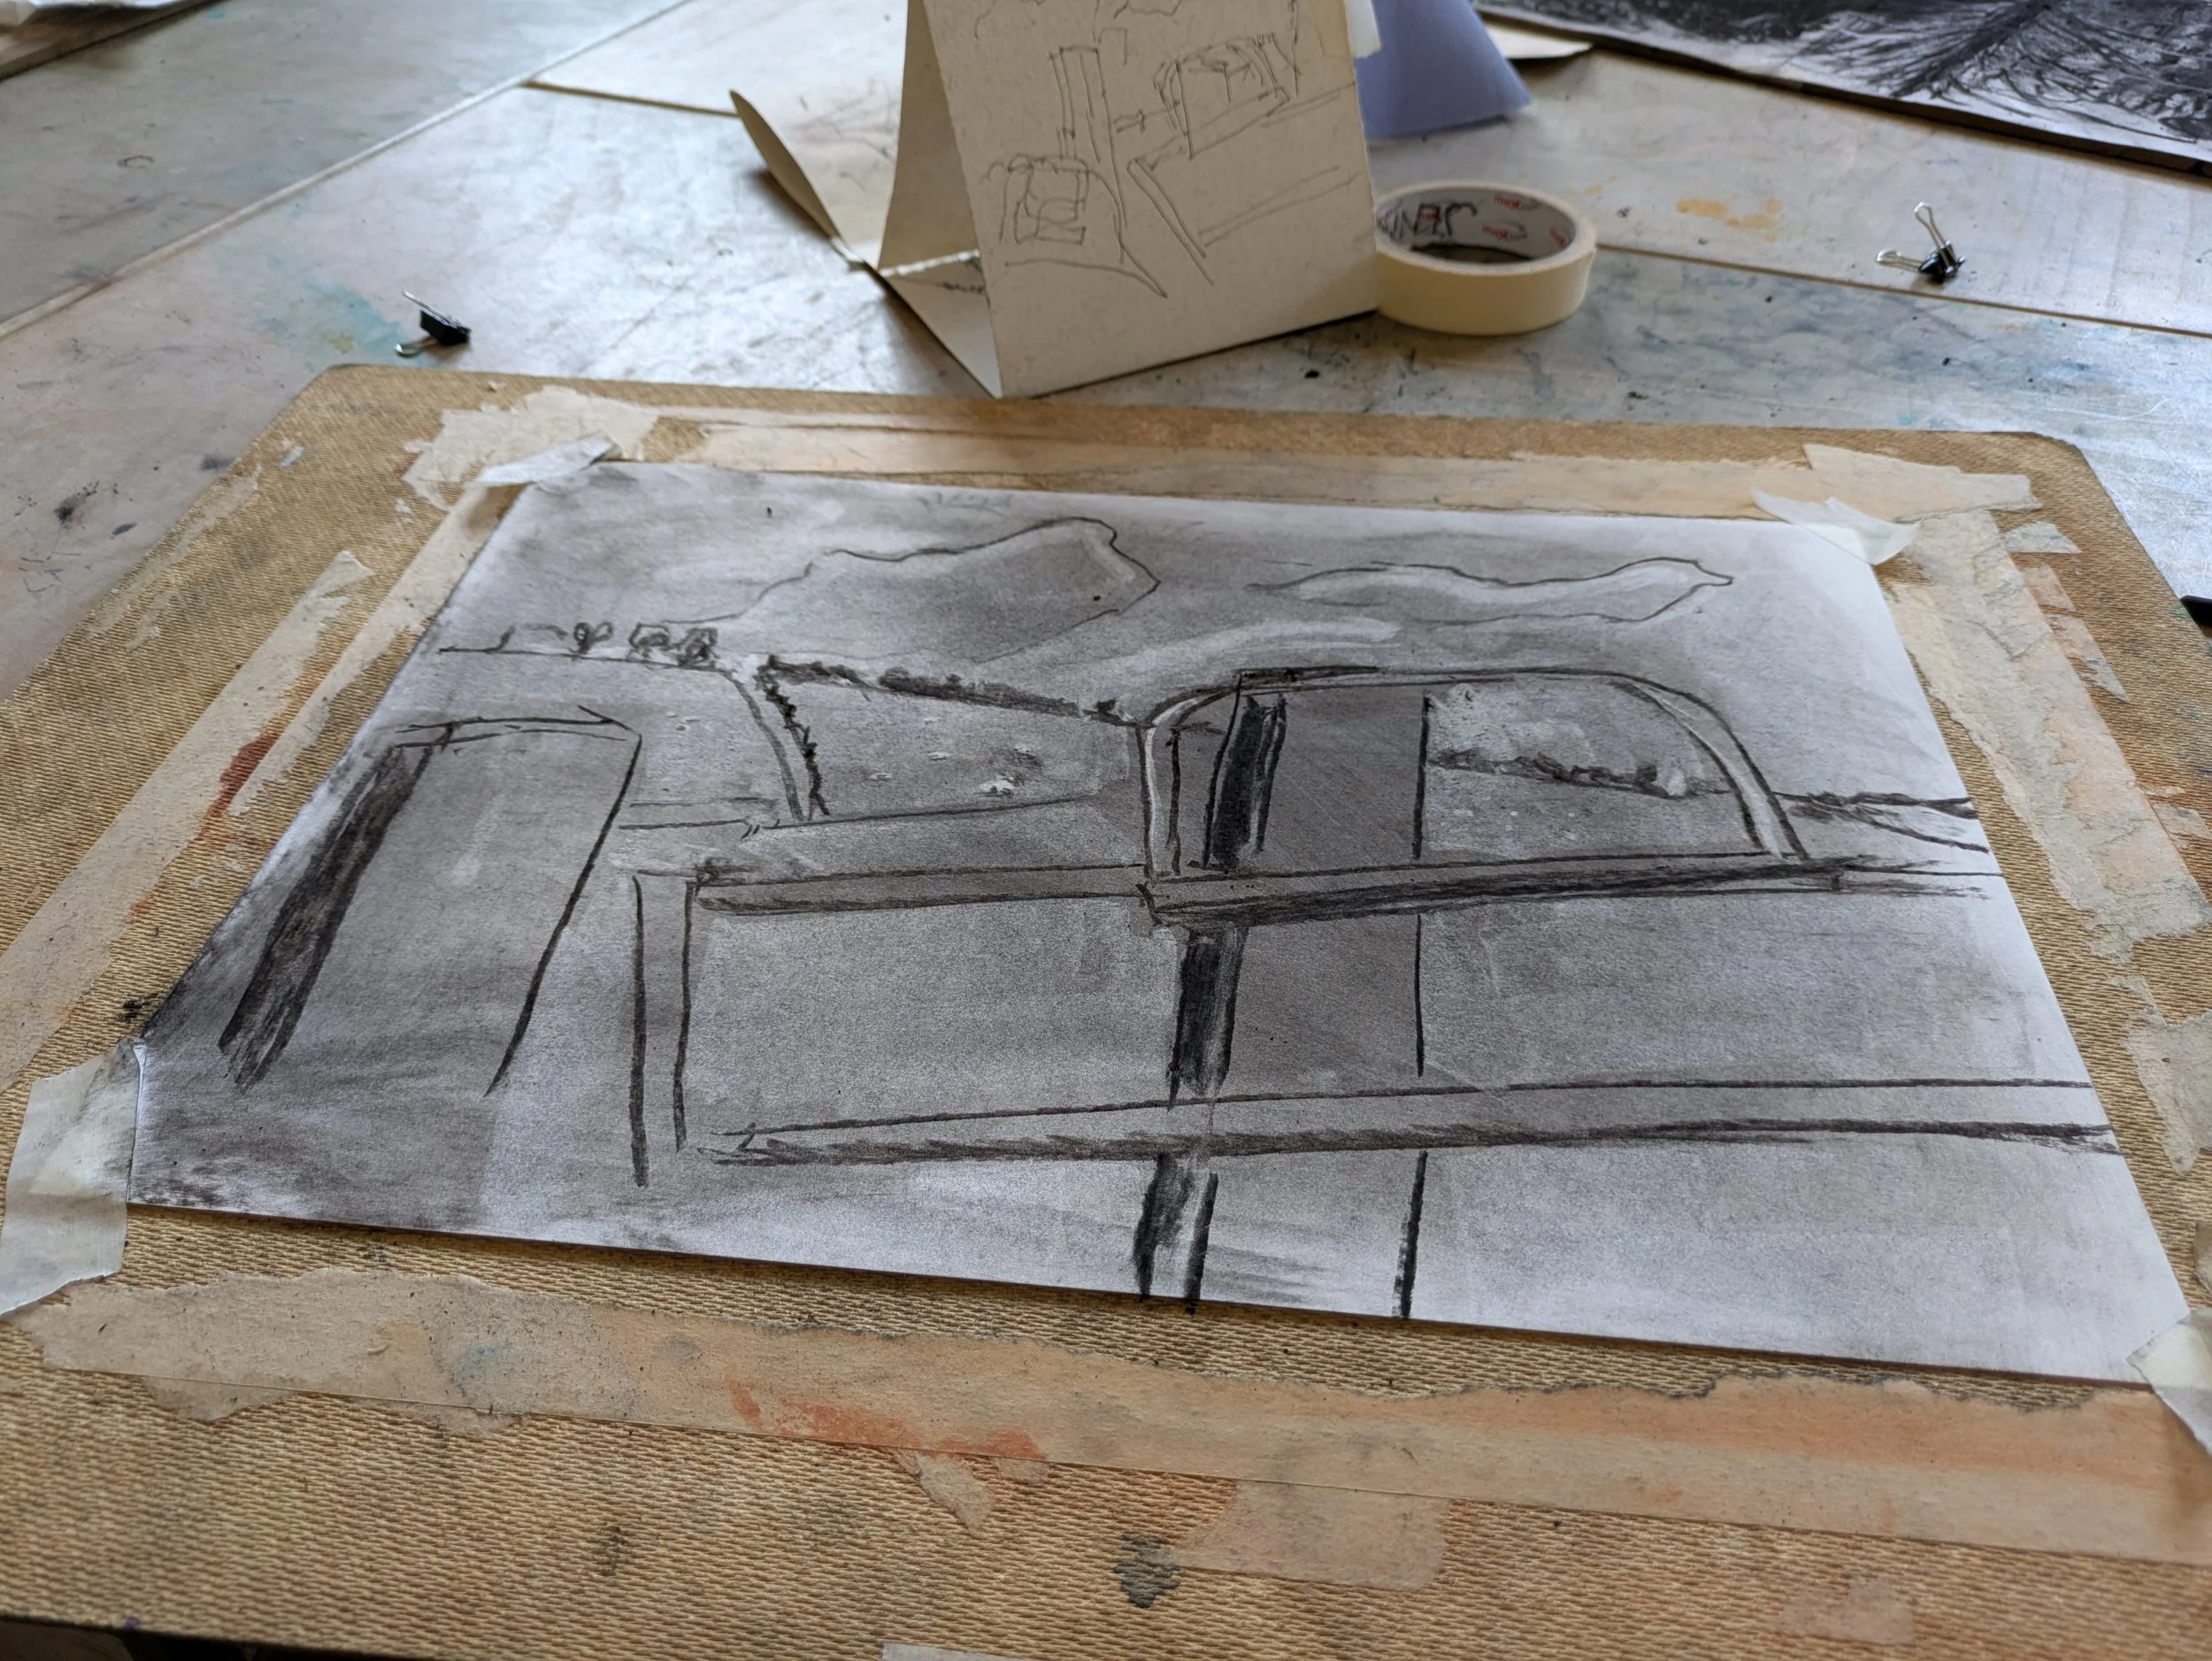
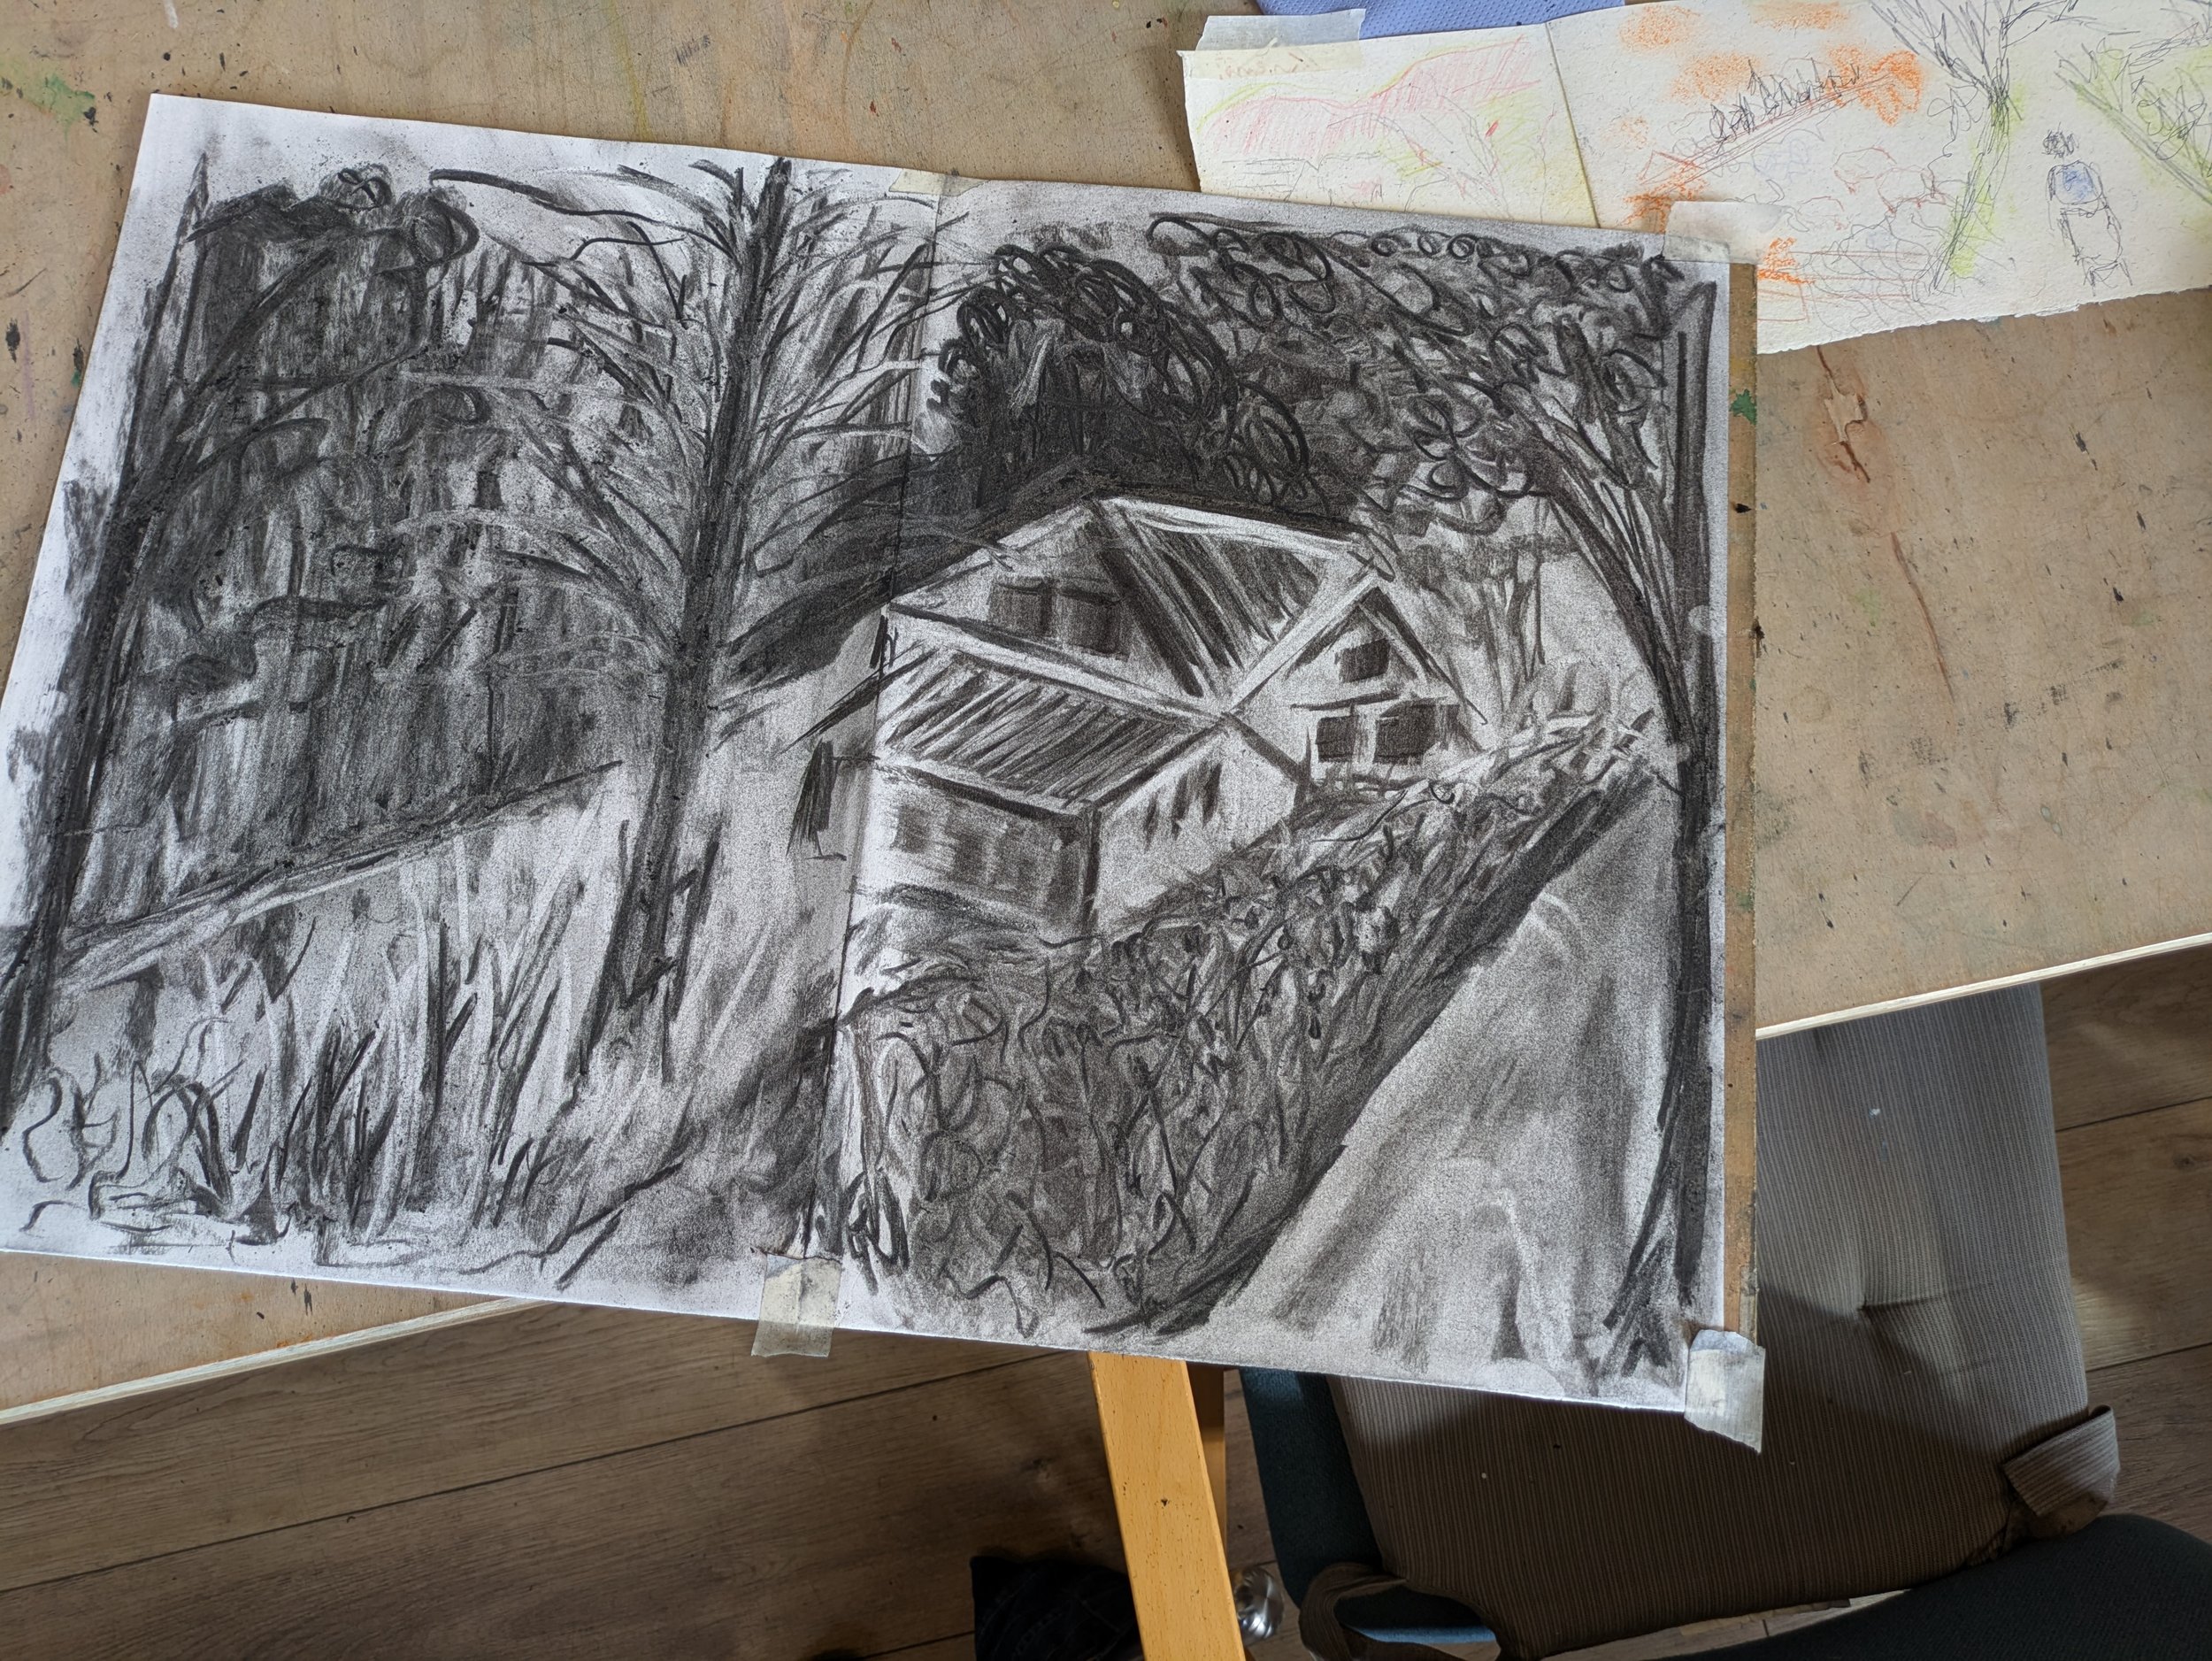
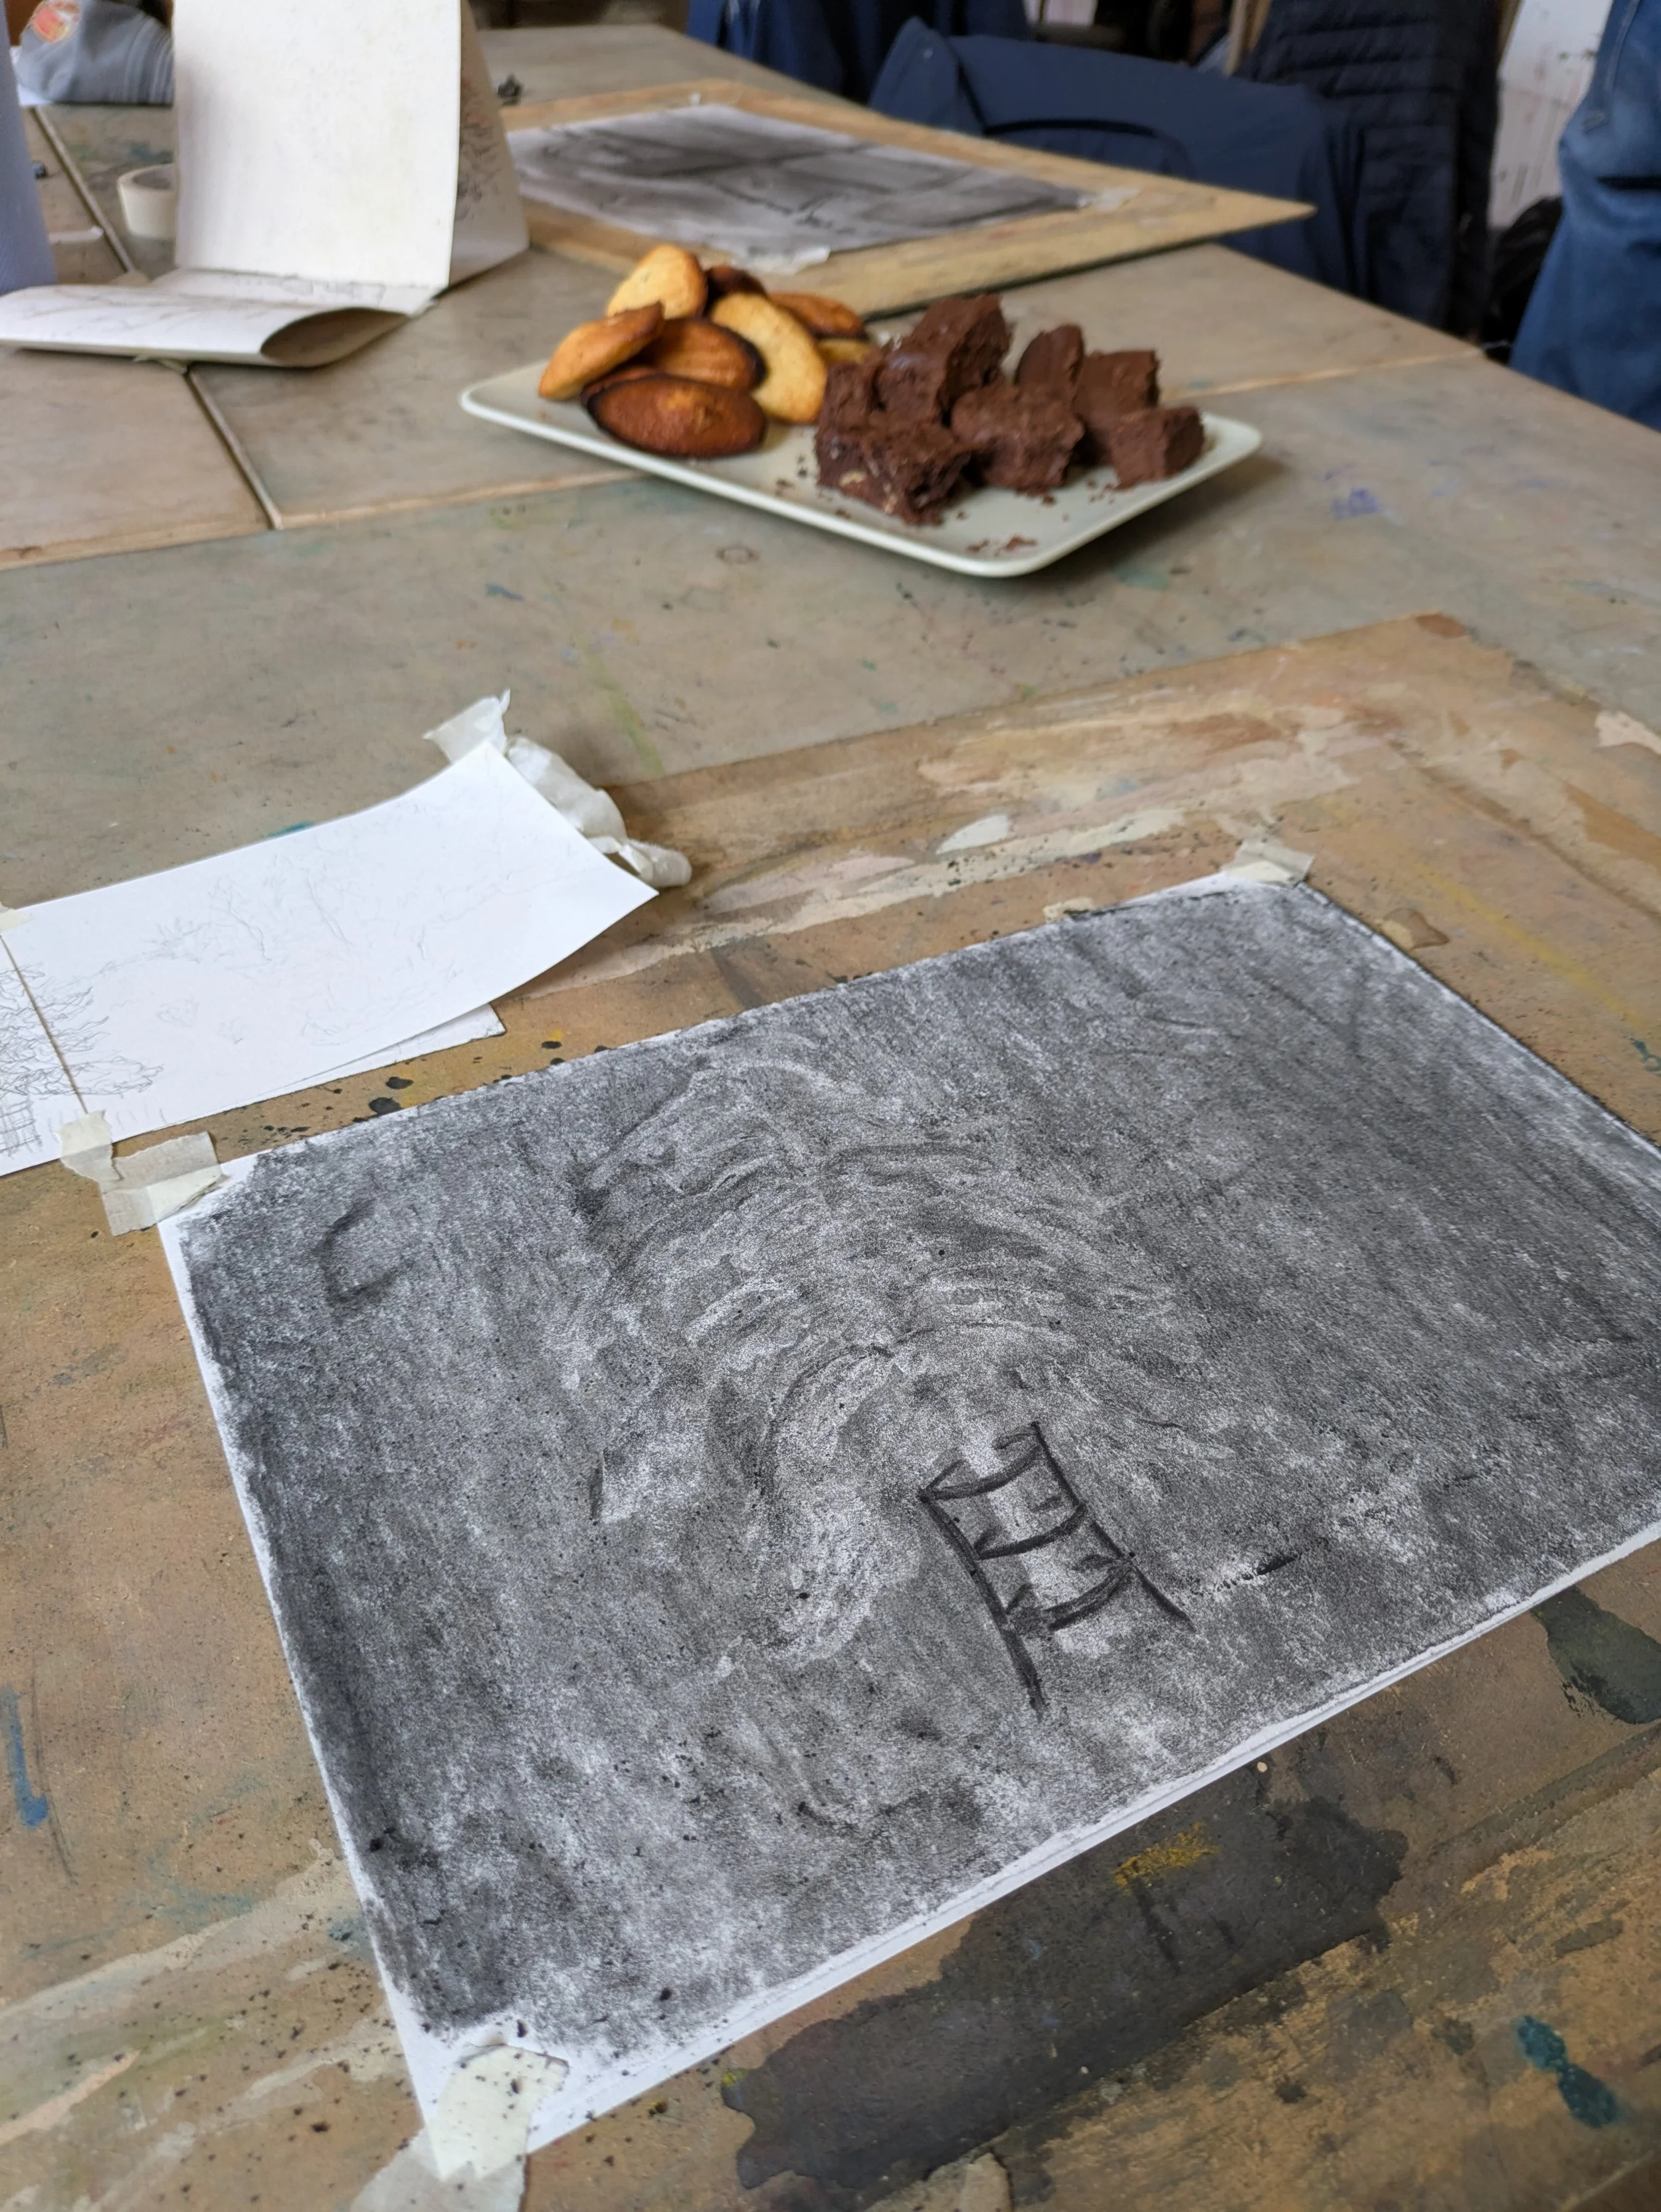
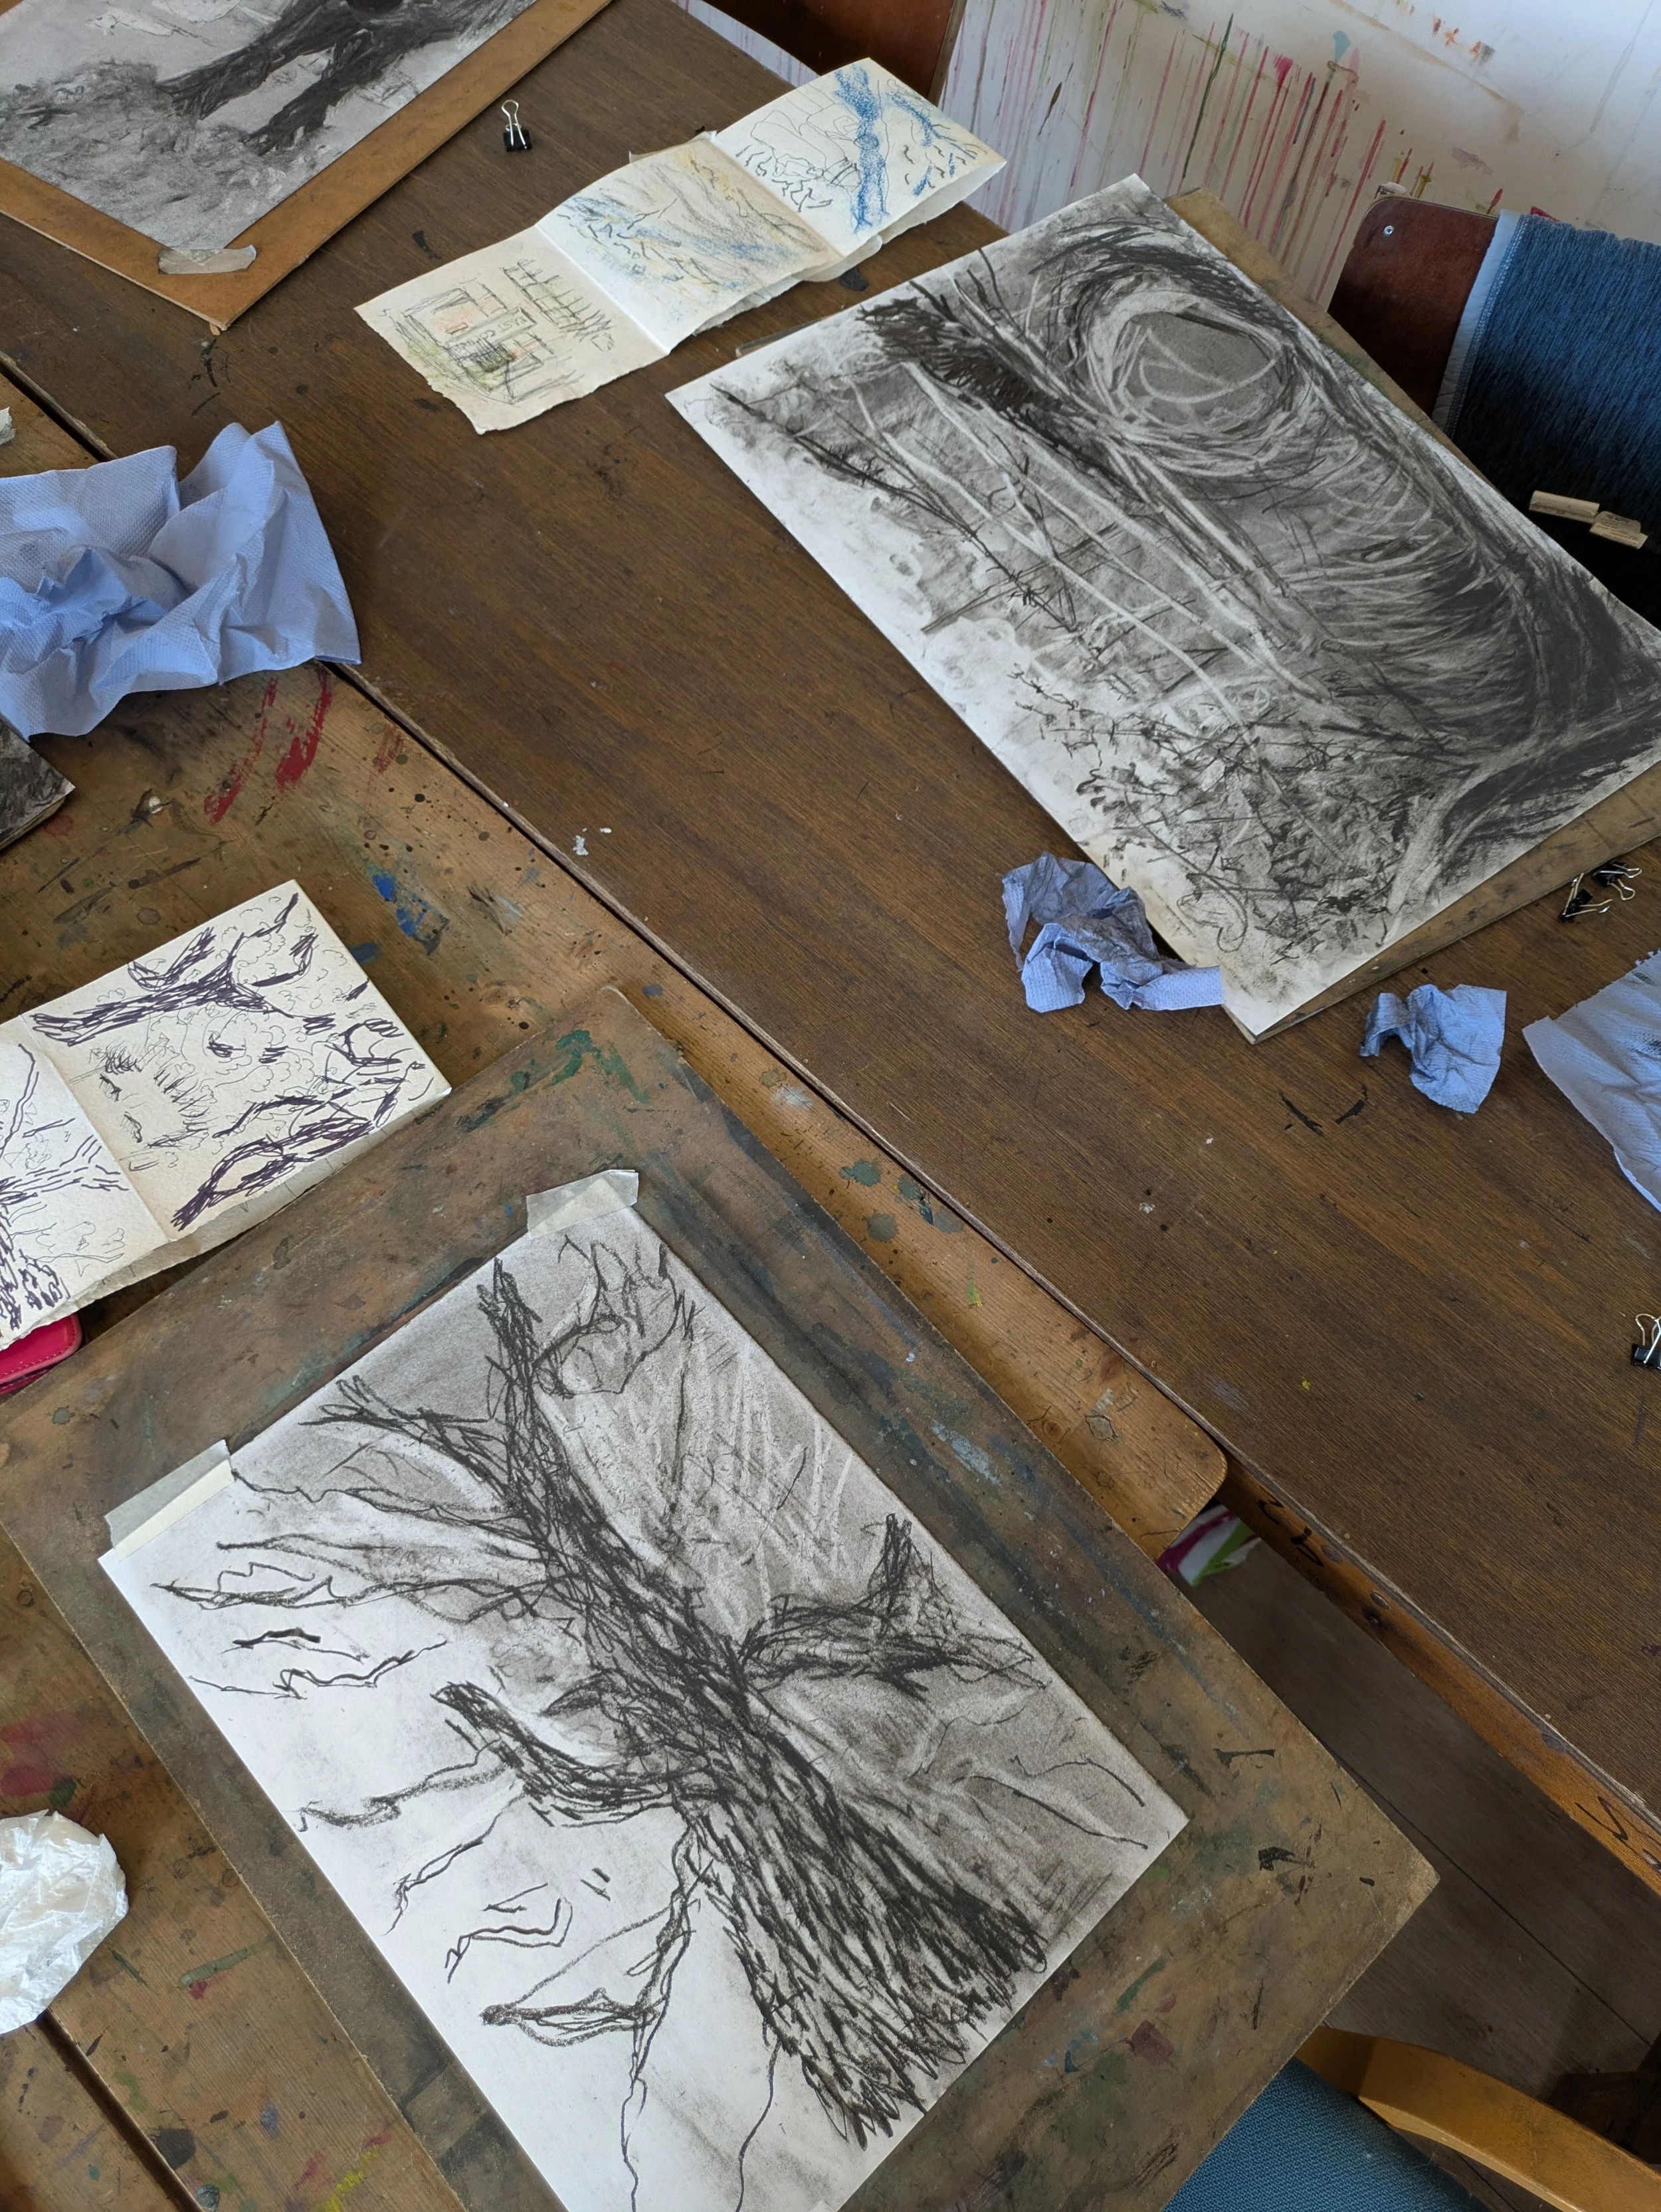
We translated sketches from our drawing walks around Wheelbirks Farm into charcoal drawings using an eraser back in the studio. There’s so much you can do with this technique
I’d love to see what you create!
Bring them along to Newcastle Arts Centre for Landscape Drawing with Charcoal, or email me: studio@francesarnold.co.uk
Landscape Drawing with Charcoal: Northumbrian Coastline
Sat 9 May 2026, 10am, - 4pm
Newcastle Arts Centre, Westgate Road NE1 1SG
£60 / person
Materials included. All abilities welcome